This project was a good assignment however I must say that the timescale was rather short. I would have very much preferred to have this assignment as a whole module that spanned a semester rather than having fewer days to work on it. It was quite difficult to transition from creating an organic model of our face using reference planes and tutorial videos to such a stark contrast of an architectural piece which we had to find our own way in.
Ultimately I am not particularly happy with our finished product. I am still rather slow at using 3DS Max and understanding all of it's modifiers and such and found that although I worked very hard at what I did I found that I couldn't quite get it to the standard I wanted before I had to move on due to a lack of time.
I am finding that my skills are growing in the software.. I may never be a 3D animator but I am enjoying it more and really want to try out more modifiers and animation techniques that I haven't used as yet. During this project I did use quite a few techniques that I hadn't come across during the last assignment which I enjoyed although I would have liked to use morpher to try lip synching with our tour guide although ran out of time.
Thursday 8 December 2011
Rendering and Editing
Well rendering was fun! We started rendering each scene that we had animated individually and lo and behold I would sit and watch and more than a few times there was a mistake.. usually something to do with the biped (not being hidden) the materials on objects not being correct (we were animating using different files of the same models however some of the external files were missing on each file) or funny things happening to the camera!
Eventually though we managed to render the separate scenes and imported them to premiere pro along with the audio files to create a fluid piece from. Alex I started this process together which Alex finished.
Eventually though we managed to render the separate scenes and imported them to premiere pro along with the audio files to create a fluid piece from. Alex I started this process together which Alex finished.
Further Animating
After the fly through of the village was at a better standard.. (still not happy with the finished introduction and if I had more time I would reanimate and re-render but due to the time it took to render this was not possible) I went inside the guild hall and as I mentioned before started the furnishing of the rooms and also started animating the shop scene.
I used the biped that Alex had created to animate our tour guide to walk through the shop towards the museum. To do this I animated the model using the footsteps selection. Once I had animated this and started on the camera I realised that the shop was too small for the camera to pan around the scene comfortably. To rectify this I refurnished the shop in a different way and moved away the outer wall to recreate a 'film set' type idea where the camera could have more space for which to move. Then Kat animated the scene.


I then used Autokey to create the movement of the camera going into the 2 museum rooms on the ground floor coming away from the shop. I tried to create a fluid movement but ran in to difficulty when I moved the camera and the target independently. I think this skill will come with more practice.
I used the biped that Alex had created to animate our tour guide to walk through the shop towards the museum. To do this I animated the model using the footsteps selection. Once I had animated this and started on the camera I realised that the shop was too small for the camera to pan around the scene comfortably. To rectify this I refurnished the shop in a different way and moved away the outer wall to recreate a 'film set' type idea where the camera could have more space for which to move. Then Kat animated the scene.

I then used Autokey to create the movement of the camera going into the 2 museum rooms on the ground floor coming away from the shop. I tried to create a fluid movement but ran in to difficulty when I moved the camera and the target independently. I think this skill will come with more practice.
Modeling Finchingfield
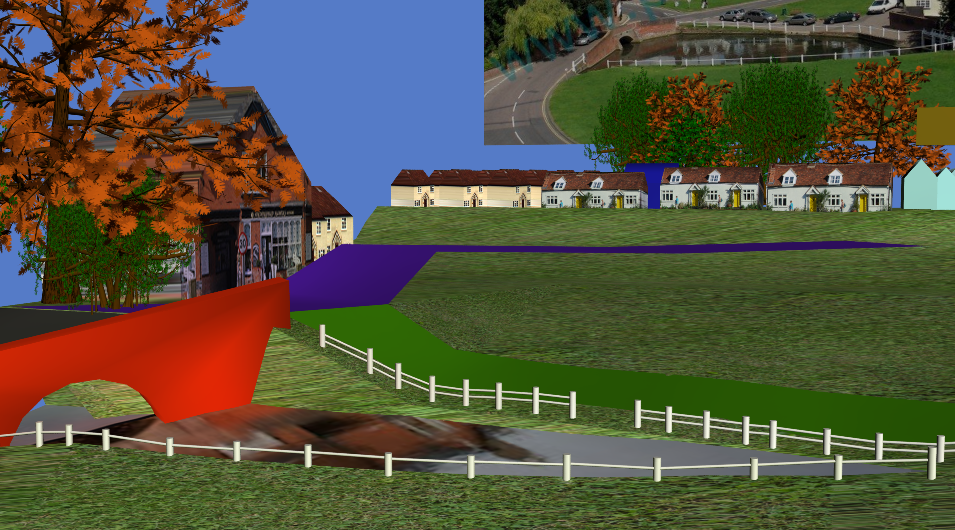
I created a simplified model of Finchingfield the village to give the guildhall a sense of geography and placement. I liked the idea of using the village as an introduction leading up to the virtual tour as in a real tour you would notice the beautiful village on your entrance.
To start modeling the village I created a reference plane from the most appropriate image I could find. Unfortunately it did have a rather large watermark but it was the most 'front on' image I could find.
The image can be found here:
http://www.google.co.uk/imgres?q=Finchingfield+village&hl=en&sa=X&biw=1040&bih=1058&tbm=isch&prmd=imvns&tbnid=NnpTPJWYTca8GM:&imgrefurl=http://www.photo-elevate.com/gallery.htm&docid=Xzxv4y8Sp1S5mM&imgurl=http://www.photo-elevate.com/Finchingfield%252520Village%252520Green.jpg&w=800&h=526&ei=rQfUTuHbPIzf8QPjzxg&zoom=1&iact=rc&dur=400&sig=102006533100558187088&page=1&tbnh=164&tbnw=231&start=0&ndsp=20&ved=1t:429,r:7,s:0&tx=143&ty=93
The unfortunate thing about modeling an entire village was that although I had a reference picture from which to work front on to, I did not have the corresponding profile view to gain a sense of perspective. This I had to judge for myself, which unfortunately took a rather long time to get right. Every time I raised the ground I would have to move the corresponding objects. Needless to say I would do a few things differently if I had the chance to start over.

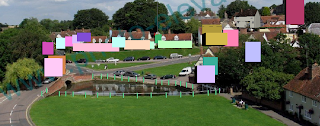
Here I created boxes in the place of the buildings according to the reference photo.

Next I used cylinders to create the posts for the fence surrounding the duckpond and used a plane to simulate the grass in front of the duck pond

Next came the grass/land of the rest of the village leading up the hill to the guild hall

Here you can see the perspective view

I added a plane for the water of the duck pond which I intended to manipulate with a water texture

Here I created the horizontal fence pieces

The bridge was quite difficult to model due to it's rather particular shape and bend whilst leading uphill

I added smoothing groups to the bridge to create a smooth road and leading wall until reaching the top where it was more square
I changed the boxes into primitive house shapes with a roof and applied a bitmap of photographs we took whilst in Finchingfield and after manipulating them in Photoshop to create the correct image. I found using UV Map a little fiddly to get the gizmo into the correct position, I did this by altering amounts of the gizmo and then used the rotate, resize and move tools to position correctly

I created different shaped buildings and such to represent the many different types of houses in Finchingfield. I also used 6 different bitmap images of buildings to create a similar effect in the model of the actual village.
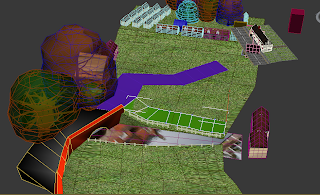
Here you can see I began creating the roads that travel through the village. I created these using separate planes so that when it came to assigning materials to them it would be significantly easier to get the correct shape and flow
I had to map each road to the contours of the land which was rather time consuming, even with the help of my new friend the vertex snapping tool!


The finished shape of the roads

Roads and bridge with materials. The road was a generic road texture found online and the bridge again taken from a photograph and manipulated in Photoshop before using UV Map. The duck pond was given a bitmap taken from a reflection of the duckpond on a photograph manipulated in Photoshop. This material was chosen to save time that I was rapidly running out of!


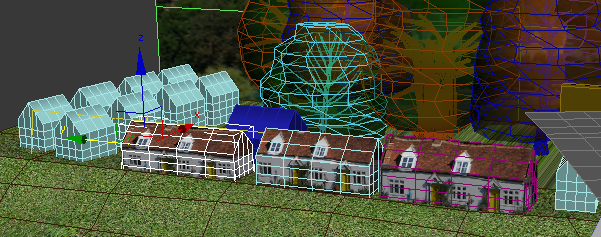
Finchingfield has many trees and to recreate this look I used the foliage section of the primitives to my advantage which I had not used before. The trees weren't exactly the right kind although I tried to make them look as realistically native to Finchingfirld as possible. I also used the autumnal colours to create a more interesting scene.


The church is a very significant building in Finchingfield and sits right behind the guildhall so I took care to model it and use uv map for the bitmap, using separate planes for the window, clock and door since I could not find a particularly straight or good photograph for which to use for the whole building.

Once I had modeled the village to a standard that we could use for animating, I added a large grass plane and a sphere to which I attached a bitmap of the sky and used 'normalise' to invert it to the inside of the sphere which was also new to me.

For the introduction to the animation we had decided to do a 'fly-through' of the village just to give the audience a feel of Finchingfield itself as this project itself is so close to the heart of Finchingfield and it's residents we wanted to portray that in the animation. I set up a path constraint for which to attach the camera to.

I then tried this path out to see how the animation looked which was not great it has to be said! The path constraint I used was far too angular and so after fiddling with the fillets of the path I decided that I still didn't like the overall effect and I created a path using smooth lines (which I didn't know existed!) and that worked much better at giving a flow to the animation.
Following this setup I rendered the 20 second introduction..... 13 hours later!!! it had rendered and I wasn't pleased with the result. I corrected the problems and rendered again. I think it took so long to render because of the trees however without them the village looked very bare so I decided to leave them in and spend the time furnishing out the guildhall, using the slice tool for a couple of the interior animations and also to create a minimised version of the village to act as a model within the museum.. for this I took out the trees!

Assets
Some of the other assets I modeled
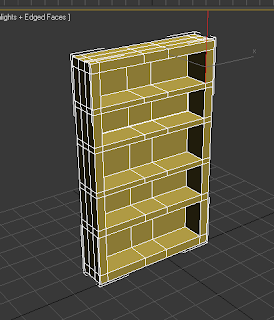
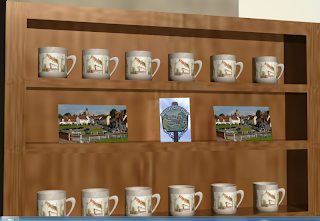


Here I modeled a simple bookcase for use in the shop and the library, manipulating a box by moving the edges and using extrude, below you can see the bookcase in the shop displaying the mugs and postcards I created

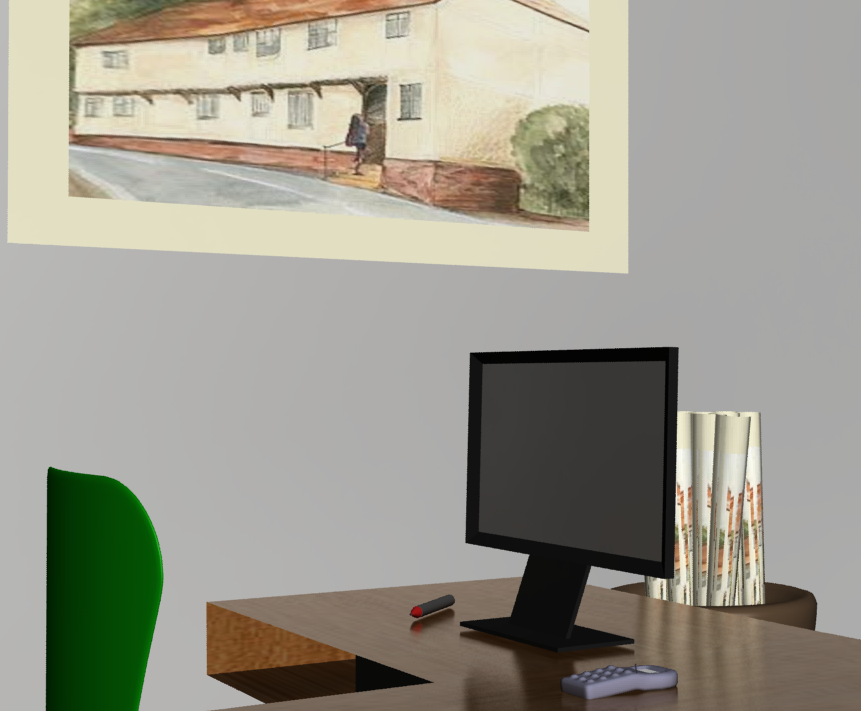
Here you can see the shop that I laid out, the poster and pot of posters I modeled. Kat modeled the desk scene.

Here is the original material on the desk that I changed.


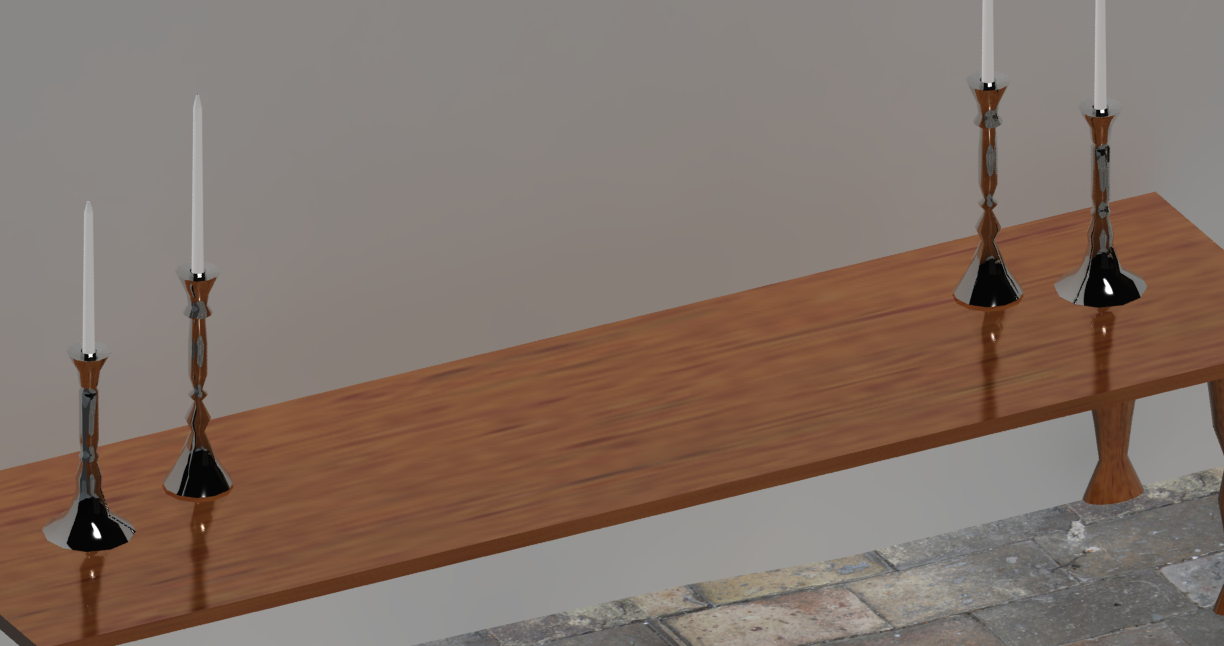
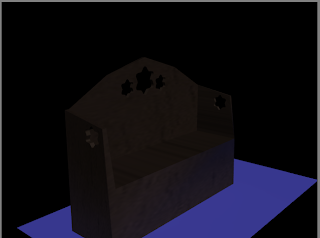
Some of the other assets I modeled were the candle sticks, pews and the photoframes seen in the museum of the guildhall, laying out each room with the furniture which was quite tricky in some areas to leave enough room for the camera to have enough space to move fluidly.

The Audio
After receiving the virtual tour soundtrack from Des, Alex and I were able to listen to the piece and decide on how we wanted to edit it. Alex took the original file into soundbooth and edited each section into our requirements. I researched a musician from Finchingfield and downloaded some ambient music to play alongside Des' tour to give the piece a very local feel and a more pleasant experience.
The acoustic guitarist's name was Alan Green and his music can be found here:
http://www.reverbnation.com/alangreen
The acoustic guitarist's name was Alan Green and his music can be found here:
http://www.reverbnation.com/alangreen
Modeling some Assets
I went about modeling some of the assests that would be used within the guildhall to furnish the new building and make the rooms look like their intended purpose.
I used quite a few techniques that I hadn't previously as well as some that I had used before. The new techniques I tired my hand at were;
UV Mapping (Postcards and Pictures on the Wall)
Bend Modifier (Posters)
Smooth Modifier and using Smoothing Groups
Shell Modifier for use on planes to create 3d shapes (Pew Proboolean shapes)
Chamfer (frames, doors, windows, mug etc)

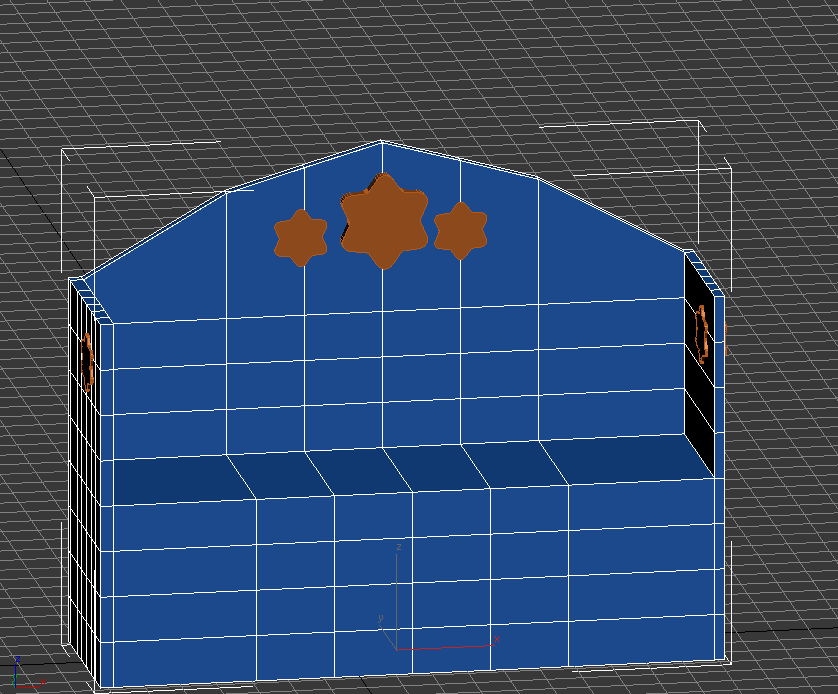
Picture Frame created and used throughout the guildhall, manipulated in size and location, adorned with bitmaps via UV Map and also used with a mirror material as a mirror frame.


The handle of the mug was created using a donut primitive and manipulated. I added smoothing groups to the handle and the mug separately to create the right look. Smoothing the entire model created a rathe interesting drinking vessel that I'm not sure you could use very effectively!


I also added a multi sub object material so that I could place an image of the guildhall on the mug, for it to be sold in the shop area as a souvenir.

Using the same image as on the mug I created a poster to adorn the wall in the shop and also to roll up and place in a pot to sell in the shop

Here I used the bend modifier to 'roll' the poster up. The bitmap did get altered slightly which I think was due to the amount of width segments of the original plane I had used for the poster. I scale the bottom to make the poster look more like a rolled piece of paper than a tube or pipe.

I modeled a pot for the posters to sit in, using extrude and turbosmooth to create the look of a terracotta pot.


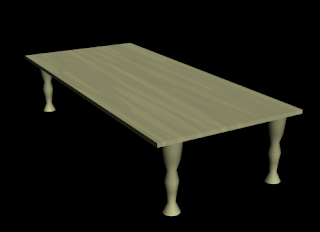
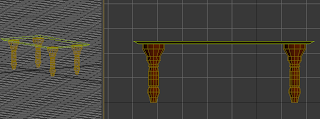
These selection of images show a couple of the tables I created for use in the guild hall. I created the legs using the Lathe modifier for one of the tables and creating a spindle primitive for the other table. I wasn't happy with the materials shown here so when I furnished the guildhall I manipulated the materials to give a more luxurious and lifelike feel.
Subscribe to:
Posts (Atom)